Launching Executions
To execute a Client-side test script, you can take the following steps:
Under Test Definitions, find the test script that supports client-side testing, select it, and click the
Create Test Setupbutton: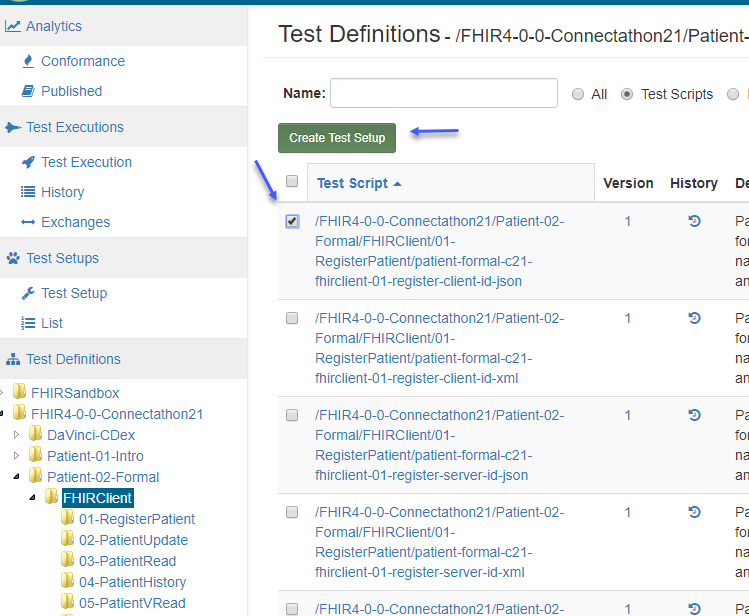
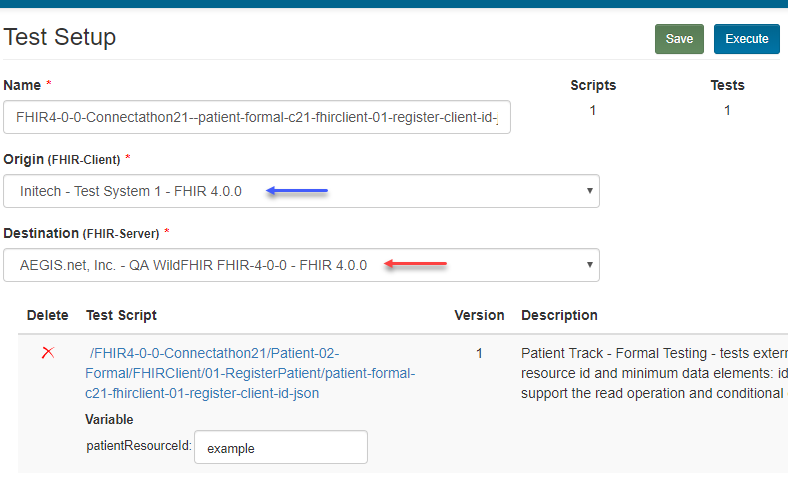
Select your test system (client/initiator system) as the Origin. It’s marked in blue below. The target of the exchange will be the Destination server and is marked in red below:
To get your server to appear in the Origin drop-down, you need to select the
Clientoption as a supported profile in your test system’s configuration: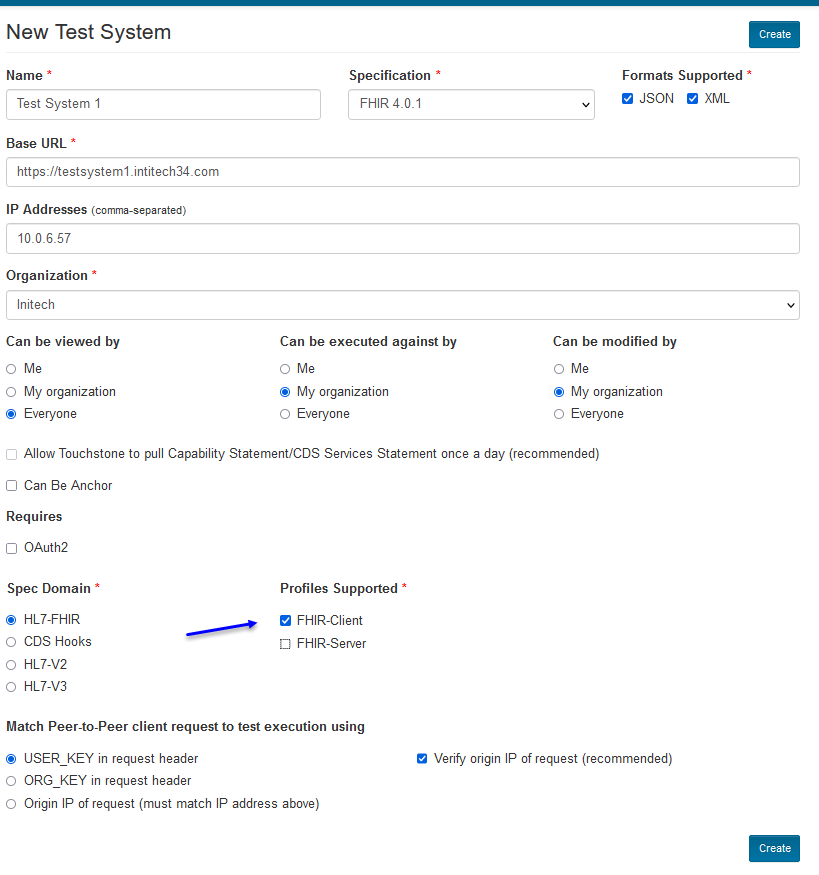
Click on
Executebutton to launch the test execution: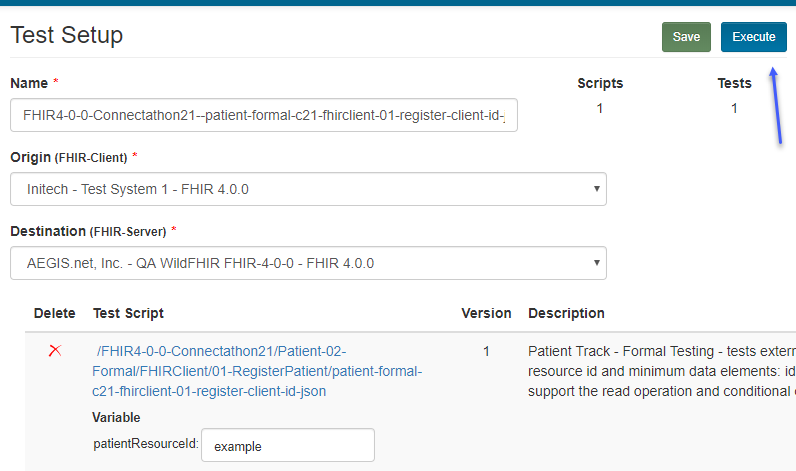
You will land on the
Test Executionscreen. The Test Script will have sections that don’t need your intervention (e.g. Setup and operations where <origin> element is missing). The test script execution proceeds until it hits an operation where <origin> element is present and for which input is required by the client test system i.e. you. That operation execution along with its test script execution and test execution will assume the status ofWaiting for Requestat that point: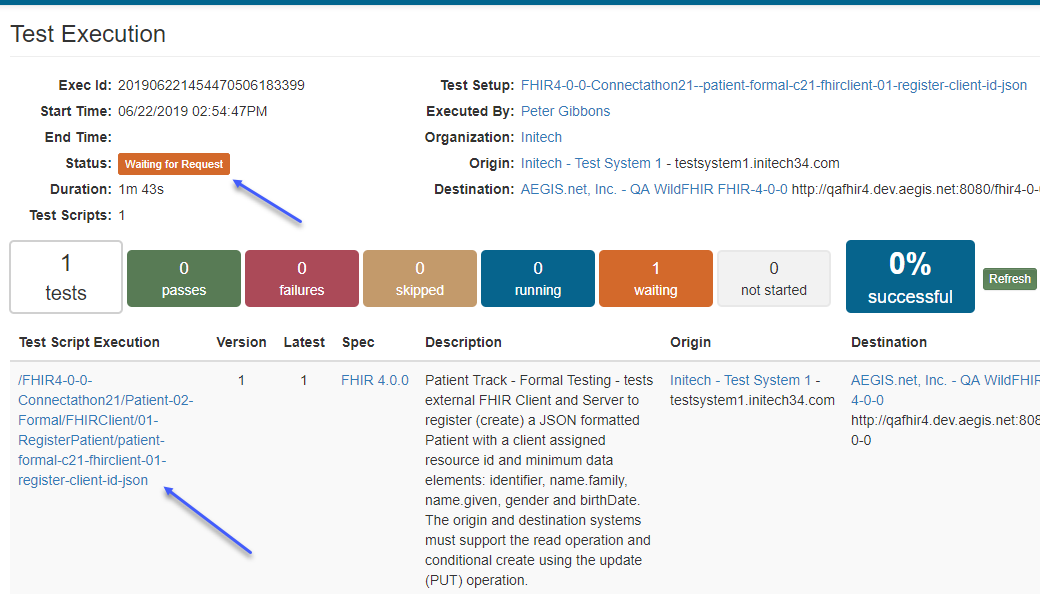
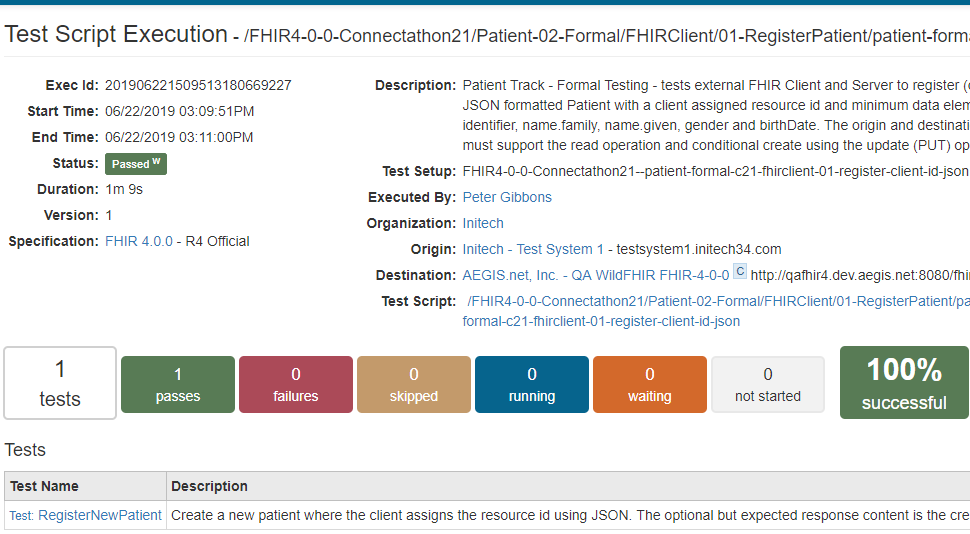
Click on the test script link above to get to the Test Script Execution screen:

In the panel highlighted above, you will find all the data you need to submit as a FHIR Client. It has the following information:
The HTTP method you need to use (GET, POST, PUT, etc.) and the URL you need to send your request to. This URL will be the Touchstone Proxy URL and will be unique to each test system. It will be different from the Base URL of the test system. The Proxy URL allows Touchstone to intercept the message and execute the assertions for that operation execution.
The Request payload (body) if the method is PUT or POST.
The USER_KEY that needs to be in the request header. This USER_KEY value will be unique to each user. It can be provided in the request header or request body and will be used by Touchstone to tie the intercepted message to your test execution.
Any other headers that are required (e.g. Accept, Content-Type, etc.).
Warning
It is important to match the request data being sent from your FHIR Client to the one indicated in the panel above.
You might get the following error if you are in the initial stages of using your FHIR Client system in Touchstone:

For added security, Touchstone verifies that the the actual IP address of the request matches the IP address of your test system in Touchstone. You get the error above if they don’t.
You can do one of the following to get around this error:
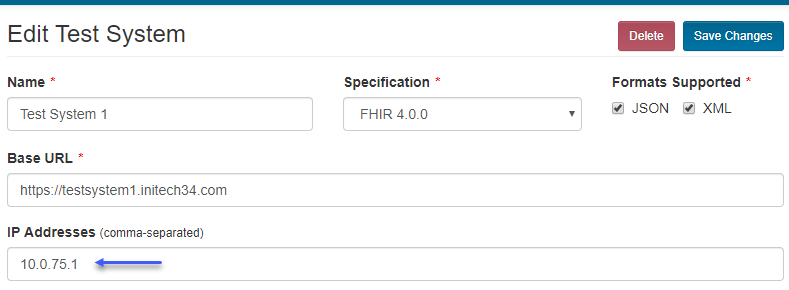
Add the IP address indicated in the message above (
10.0.75.1for the case above) to the list of IP addresses of your test system:
Uncheck this box on your test system.
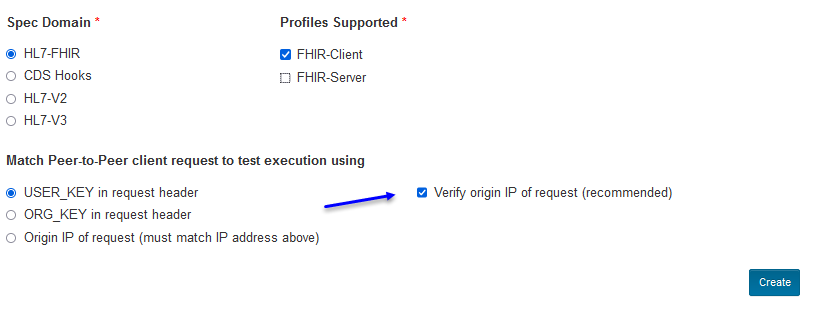
It is recommended to do option (a). If you do option (b), then other users can configure their test setups with your test system playing Origin and submit requests from their FHIR Clients. This will give the impression to end-users that the request came from your test system when in fact it came from another FHIR Client. If you don’t have such a concern (because you have marked your client test system as accessible/executable only by ‘My Org’), then option (b) is more convenient as you don’t have to change the test system’s IP Address in Touchstone every time the IP address of your FHIR Client changes.
You continue to initiate from your client test system as required by any remaining
Waiting for Requestoperations until the test script execution completes successfully: